Search This Blog

Sunday, October 23, 2011

Suck it, Rudolph.

I want to start out with some quick, pastry-related bragging, before I get on to the main event.


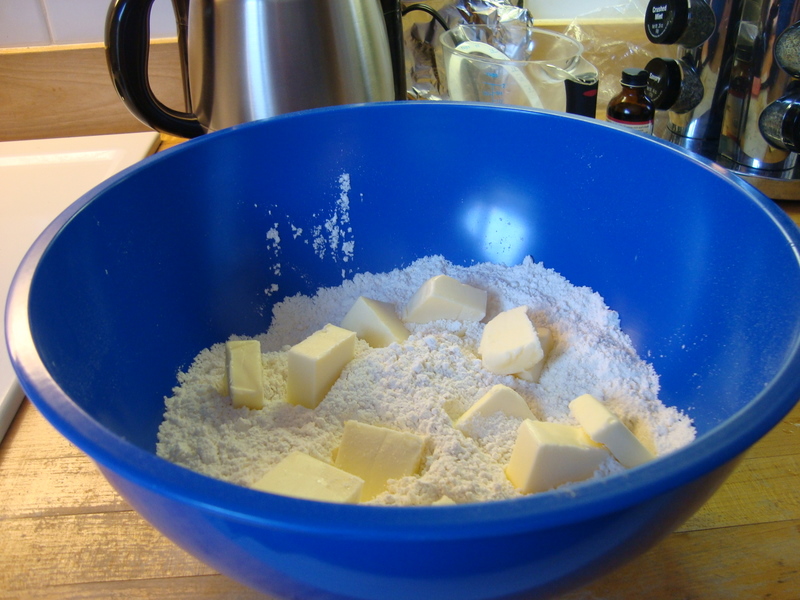
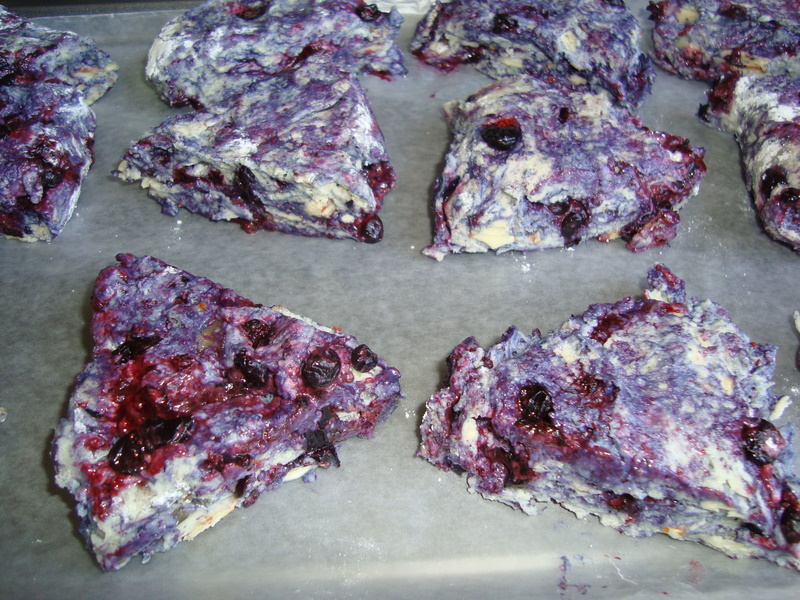
Oh, heeeey gluten-free scones, how YOU doin'? ;)

Observe, admire, fawn over these glutenless goodies.

Awesome. Thanks for participating! Now, on to the newest project: holiday-theme cooking.

I'm typically a total holiday buzzkill. The weather always sucks (winter = cold = awful), Thanksgiving just makes me sleepy (damn you, tryptophan!), Christmas music is seizure-inducing, and electronic singing Valentines make me want to kill someone with a ninja star

But there is one holiday that I can get on board with. HALLOWEEN!!!


Halloween is far superior to every other holiday. Ghosts and skeletons and dismembered body parts are a million times cooler than Rudolphs and Albuquerque Turkey (remember that song?!). Hocus Pocus trumps The Santa Clause. And think about it! Would The Nightmare Before Christmas be any good if it weren't set in Halloweentown? 

I think I've made my point.

Anyway, this post's adventure is about baking ridiculously adorable ghost-shaped meringues (mereangs? mirenges?).

YES. YOU READ THAT CORRECTLY. GHOST MERINGUES.


Please try to contain your excitement. And for the rest of this entry, let's pretend that I'm baking these cutesy cookies for my "brother's kids". Because Casper-shaped desserts probably shouldn't make a 20-something grad student THIS excited.

Meringue is basically just whipped egg whites. Actually, that's exactly what it is. There's only 4 ingredients, hence, it should be the easiest thing in the world to make.


Aaaaaaaaaaaand then I enter the picture.


The only 2 things I lacked were enough egg whites, and mini chocolate chips for the eyes. Easy-peasy-lemon-squeezy! I didn't want to waste 9 whole eggs just for the whites, and I normally buy those cartons of egg whites anyway, so I made a quick grocery run.


Of course, liquid egg whites were the only thing in the entire friggin store that hadn't been re-stocked today. Just imagine that long, florescent-lit aisle, packed to the brim with every dairy and imitation dairy item known to man, and one tiny little ironic empty space where my product should have been. 

I wish I'd gotten a picture of it.


Oookay, so, no egg whites. I figured I could at least get the mini chips. So I skipped on over to the baking needs aisle.


Not a bag of mini chips in sight.

They had 60% cacao dark bittersweet chips, caramel morsels, peanut butter chips, white chocolate morsels. SERIOUSLY, how many flavors of chips does our culture really need?!? Also, what's the deal with the "morsels"? Personally, I think a morsel sounds smaller than a chip. It sounds downright microscopic. But nope, morsels are just Hershey's way of pretending they are special.

Get over yourself, Hershey.

Anyway, ghost meringues without eyes = weird meringue blobs. That simply will not do. So I settled for a bag of miniature Hershey kisses ("my brother's kids" hate milk chocolate, but desperate times...) Then I traipsed alllllll the way to Trader Joes (about 0.3 miles farther than Shaws) to get the carton of egg whites. I am such a dedicated aunt.


Back at home, after successfully completing those gorgeous gluten-free scones, I moved on to the meringues. I whipped 9 eggs' worth of liquid egg whites for approximately a millennium, after which I had a large bowlful of........very frothy egg whites.


They are supposed to form stiff peaks (heh...stiff peaks) after only a couple minutes! What's the deal, yo?!


I tried several remedies. I chilled the bowl. Nada. I divided it into 2 bowls, thinking maybe it was just too much for my little mixer to handle in one go. Zilch. I added more cream of tartar. Diddly-squat. Eventually, I admitted defeat, and switched to old-fashioned eggs. Of which I only had 5. So the recipe had to be halved.


In summation, while trying not to waste 9 eggs, I managed to waste 5 plus 9 eggs' worth of whites instead. There goes breakfast for a week.

Oh, and did I mention that miniature Hershey kisses are exactly the same size as normal chocolate chips?


At least the final product looks creepy-crawly-spooky-kooky AWESOME, so it was all worth it! "My brother's kids" love them.


Getting my revenge on the very-not-miniature Hershey kisses.
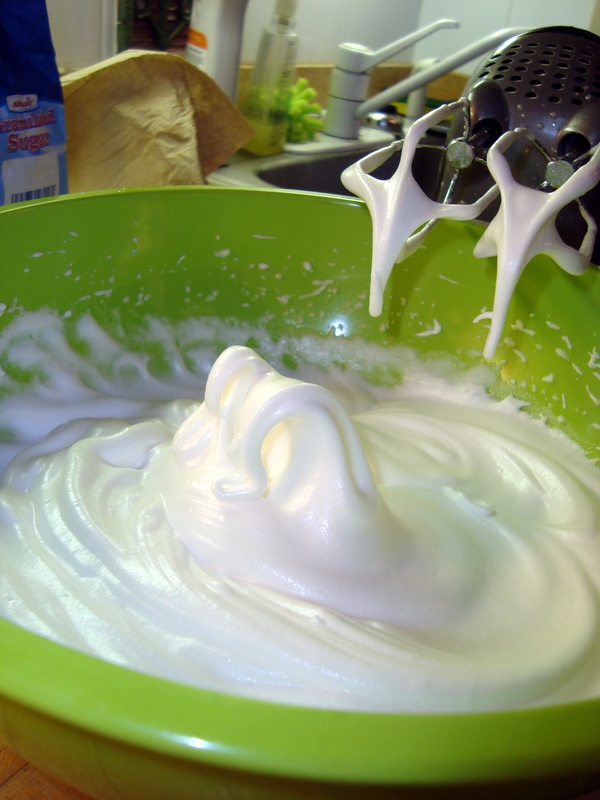
Nice stiff peaks ;)

CUTE AS BUTTONS!

Tanning in the nude.


Little Meringue Ghosts
5 large egg whites
1/2 teaspoon cream of tartar
1/2 teaspoon vanilla extract
1/2 cup sugar
miniature chocolate chips

1. Heat oven to 200 degrees F. Line cookie sheets with parchment paper.
2. In large bowl, beat egg whites, cream of tartar and vanilla extract with electric mixer on medium speed until soft peaks form. Gradually add sugar, 2 tablespoons at a time, beating on high speed until stiff glossy peaks form and sugar is almost dissolved.
3. Spoon half of meringue mixture into large resealable food-storage plastic bag; seal bag. Cut off corner of bag. Squeeze bag to pipe ghost shapes onto cookie sheets. Repeat with remaining meringue. Insert miniature chocolate chips for eyes.
4. Bake for 1 hour. Turn off oven; leave meringues in oven with door closed 8 hours.

From: Pilsbury 

Friday, October 7, 2011

A post about food.

Why hello!! (if you aren't already wise to the genius of Hannah Hart, I beg of you, check out her videos/web site- hartoandco.com, she is the genius behind my drunk kitchen)

It's strange for me to write this post to a group of people who essentially are strangers, but I feel like I know at least fairly well. I have heard so many stories about you all, and I realize that we, in fact, have never actually hung out. Which saddens me, but also gives me the opportunity to fool you all into thinking that I'm a person who has her sh*t together and has a social life (however, I feel like that cover is blown when you realize that the time stamp for me writing this is on a Friday night....).

Because you all don't actually know me, I will fill you in on a couple things about me (I promise, this will be related to cooking eventually). First of all, I am type-A microbiology nerd who makes lists in her sleep and isn't happy unless she has a million things going on. However, I am loosey-goosey in the kitchen, singing and dancing areas. This may be because my mother had some sort of aversion to recipes (trying to remake anything she made is maddening....) but I rarely plan ahead for meals and often is too lazy/cheap to buy specific ingredients.


ONTO the cooking!! So in my fridge there was tomatoes, asparagus and a can of artichoke hearts in the cabinet. Because my oven currently has some sort of resin on the bottom of it and every time I turn it on the apartment fills with smoke, and my neighbors call the fire department because they think the building is burning down (yeah...that was embarrassing) I decided that roasting the vegetables was not an option, although that is my favorite method for cooking asparagus. Instead I decided to throw everything into a sautee pan with some olive oil and garlic, and let them cook slowly (allowing me to simultaneously watch modern family, #win).

As the asparagus got nice and roasted and the tomatoes started to burst open, I added the artichokes and heated everything through. Last minute decision to add a tablespoon of pesto to the whole she-bang, and then topped with some fresh mozzarella. Delicious, easy peasy and lots of leftovers for lunches later in the week!


Bon appetit (a la Julia Child) my fellow bloggers! Hope your weekends are far more socially exciting than mine's starting off to be!


(ooh look at me with all my hipster instagram pictures)

A lesson learned

I am pretty obsessed these days with making sure that I use up EVERYTHING in my fridge/freezer/pantry without throwing things out. All you socially conscious friends and family out there, I'm sure you understand. I cannot, in good faith, discard food simply because I just had too much on hand that I couldn't eat it all.

After my buttermilk-chive biscuit fiasco on Tuesday (yes, I actually made things WORSE after the idiot rice...let's just say my apartment ended up filled with smoke and leave it at that) I decided to stick to baking for a little while. Because even I know that when baking, you must must muuu-huuusstttt read the recipe and follow it. And that was my downfall with the rice.

I assessed my food situation. I have buttermilk (which, for the record, cannot be used as a substitute for regular milk in coffee when you run out and don't want to go to the store), I have frozen blueberries, I have some fresh ginger. Okay, google them all together and thank you epicurious! Up pops some great lookin' scones. I LOVE SCONES. Score.

The recipe is actually for plain old ginger-pecan scones. I don't have pecans, but I have almonds! Same dif. Nuts are nuts. They will all equally kill you if you are allergic. It's a good thing I don't have any friends with nut allergies, because I am that person who will cook with chicken stock and feed it to an unsuspecting vegetarian because, hey, I am not going to buy special stock just for you buddy. You will eat the liquid chicken and you will like it. Mwahaha. (Except for you, Chanel & Jahna! No worries!) I always bake with nuts, so yeah, I'd probably be sending a lot of friends to the ER. Good thing I'm almost an EMT though, right? I know...you feel so much safer now. =)

So I started making the scones and decided to just add the frozen blueberries at the last minute. Who doesn't love blueberry scones, right? The first few steps went GREAT. I couldn't believe everything seemed to be turning out as it should. That almost never happens to me. And there is a reason for that, hence, I really should get nervous when nothing is going terribly wrong.

Mmmmm. Chunks of butter.
Adding the crystallized ginger.
Make a well in the dry ingredients and add the buttermilk mixture.

And then, BAM, I add the blueberries. The final ingredient. And as I kneaded those little buggers into the dough, they proceeded to make my hands look like I murdered Tinkiewinkie, the purple tellytubby. Blueberries are FUCKING MESSY, JEEEESUSSSSS. I am so so grateful I thought to put some wax paper down on my countertop before I kneaded the dough, because otherwise, my landlords would have a very purple wooden countertop on their hands when I move out. Heh. Whoops.


Blueberries, before they turned on me.
After I wrestled the dough into very purple submission.
The final product. YUM.

Anyway, for you folks out there who will attempt this recipe later, just take note. This is why every single freakin scone recipe out there calls for dried fruit. Because otherwise you end up with some very bruised-looking palms.

I plan to tell inquiring minds that I got into a super intense slapping fight. Obviously I won.


*Notes: I did not add the extra sugar on top at the end because, after sampling some of the dough, it was already just sweet enough. But I don't like super sweet things. I also didn't brush them with buttermilk at the end because they were already too wet from the frozen blueberries melting into the dough. Finally, I didn't have enough crystallized ginger to begin with, so that step was also ignored. Everything still turned out DELICIOUS. =) Enjoy!! I recommend freezing them for future rushed mornings, or giving them to your neighbors because then they will loooooove you.

Ginger-Pecan Scones
3 cups all purpose flour
2/3 cup plus 1 tablespoon sugar
1 tablespoon baking powder
1 1/2 teaspoons ground ginger
1/2 teaspoon baking soda
12 tablespoons (1 1/2 sticks) chilled unsalted butter, cut into 1/2-inch cubes
1 1/3 cups pecan halves, toasted, chopped
1/2 cup plus 3 tablespoons chopped crystalized ginger (about 4 ounces)
1 cup plus 1 1/2 tablespoons buttermilk
1 1/2 teaspoons finely grated peeled fresh ginger
1 teaspoon vanilla extract

Preheat oven to 425°. Line large baking sheet with parchment. Whisk flour, 2/3 cup sugar, baking powder, ground ginger, 3/4 teaspoon salt, and baking soda in large bowl. Add butter; using fingertips, blend butter into flour until coarse meal forms. Toss in pecans and 1/2 cup crystallized ginger. Whisk 1 cup buttermilk, grated ginger, and vanilla in measuring cup. Form well in center of dry ingredients. Add buttermilk; stir with fork until moist clumps form. Transfer to lightly floured surface. Knead just until dough comes together; divide in half. Form each half into 6 1/2-inch disk. Cut each disk into 6 wedges. Transfer to sheet. Brush with 1 1/2 tablespoons buttermilk. Sprinkle with 1 tablespoon sugar and 3 tablespoons crystallized ginger; press to adhere.

Bake scones until golden and toothpick inserted horizontally into center comes out clean, about 20 minutes. Cool scones on sheet on rack.

Bon Appétit, April 2011
by The Bon Appétit Test Kitchen

URL:
Ginger-Pecan Scones

Tuesday, October 4, 2011

A Recipe for Disaster: Attention Deficit Disorder & Cooking

So,  let's start with this. If you have ever met me even once, even for 5 minutes, that's enough time to realize I have some serious ADD, because my attention span at its un-medicated worst is about 3 minutes...tops. Shiny things are my world, as is playing with my hair and wondering if I should dye it again, and thinking way too much about how I would rather be surfing for cheap international flights on Kayak.com than most other things.

Tonight, I made dinner for one of my best friends and her new significant other, so I could get to know said sig.oth. by plying their soul open with delicious food. I can be quite charming when I want something from you, for example: info about whether you deserve to be dating my amazing friend ;) (Complimenting me on my cooking will definitely score points, for the record.)

Tuesdays are a long looooong day of classes for me, so my "paying attention reservoir" is pretty much depleted by 4:30 when biostats is over. So attempting 3 brand new recipes--probably not the world's smartest thing to do. But like I said, the limit has been reached, and there is very little brain power left by evening. Stupidity is to be expected. I trip a lot and end up with random burns and bruises because of days like Tuesdays.

Thankfully, one of the recipes I attempted was pretty much idiot-proof. It basically goes: cut open squash, don't slice off fingers, put squash in oven for 40 minutes. Great. Done. I'm awesome. Feeling good about myself right now.

Oh wait, FALSE. Apparently I can actually mess up something as simple as the next dish I attempted which was Spanish red beans & rice. I was instantly frustrated because the recipe called for bacon, which is very inconsiderate of it considering my friend is a vegetarian. How dare that age-old recipe make my life more difficult?!

So I figured...okay...bacon. The most important parts about cooking with bacon are the fat you render from it and the saltiness of said fat. (Mmmmm, aren't you drooling now? As your arteries slowly clog up?) So I substituted bacon fat for just plain old lots and lots of butter and extra salt. Awesome. I rock. Smells good...let those onions and garlic do their savory mouth-watering job filling my apartment with great aromas.

In the meantime, I saw rice on the ingredient list and somehow my IDIOT disordered tired brain thought "oh, okay, cooked rice. Got it".

No. Wrong. Not cooked rice. Just regular, plain, uncooked, normal rice. IDIOT. But said rice was already cooked in my lovely rice cooker, and there was no turning back. So I ended up just mixing all the rest of the ingredients together in the onion/garlic/tons of butter pot, trying not to let anything burn on the bottom because there was no rice or liquid to prevent that...

Oy vey.

Once the mixture that should have boiled with the uncooked rice to give it a lovely integrated flavor seemed ready, I added the cooked rice and mixed it all around until it at least resembled what it should have been. As for the flavor? Well, it was lacking. Because this idiot (me) cooked it wrong so none of those yummy flavors had the opportunity to penetrate into the dish! So I added cayenne pepper and more salt to pump up the experience, and let it sit covered in the pot off direct heat for a little while.

It didn't turn out horrible, as I had terrible visions it would. My quick thinking and pure, utter genius (yes, I'm back to praising myself) with the cayenne pepper saved it! And I think I may have just invented a very quick, though admittedly not quite as delicious or flavorful, vegetarian version of red beans and rice.

Anyway, enjoy the recipe. I'm including the original, but you can deduce the new IDIOT version from the above entry. Have a lovely evening all. I'm gonna go eat some more rice!


RED BEANS & RICE
  • 3 bacon slices, chopped
  • 1 cup chopped onion
  • 3/4 cup chopped red bell pepper
  • 4 garlic cloves, minced
  • 3 cups long-grain white rice
  • 3 bay leaves
  • 2 tablespoons tomato paste
  • 1 tablespoon ground cumin
  • 1 tablespoon hot Spanish smoked paprika (Pimentón de la Vera)
  • 2 teaspoons salt
  • 4 cups water
  • 1 15- to 151/2-ounce can kidney beans, rinsed, drained
Sauté chopped bacon in heavy 4-quart saucepan over medium-high heat until bacon is brown and fat is rendered, about 5 minutes. Add onion, red bell pepper, and garlic; sauté until onion is golden, about 5 minutes. Add rice and stir until coated, about 1 minute. Stir in bay leaves, tomato paste, cumin, paprika, and salt. Add 4 cups water and beans and bring to boil. Reduce heat to medium-low; cover and cook until rice is tender and liquid is absorbed, about 18 minutes. Remove from heat; let stand covered 10 minutes. Fluff rice with fork. Remove bay leaves. Transfer rice to bowl and serve.

Source: http://www.epicurious.com/recipes/food/views/Red-Beans-and-Rice-234813

Sunday, October 2, 2011

Wine-infused treats


Hello everyone! I'm Mary, blogging from Atlanta.

These recipes are courtesy of my aunt. I was looking for a way to enhance my love of wine, and these two recipes certainly hit the mark.

White wine-infused chicken

Pour some white wine (any kind should do) over chicken breasts or your fish of choice in a small baking pan (make sure the edges are high enough on the pan). Add some herbs or spices of your liking. I made mine with thyme and chopped rosemary as well as cracked black pepper. Cover the pan with aluminum foil and bake at 375F for 30 minutes. The smell is literally intoxicating :-)

Red-wine pasta sauce

In a medium/large pot, saute chopped yellow onions in olive oil. Add some minced garlic (I added a heaping spoonful of the canned kind).
Then add in chopped tomatoes. You can use fresh ones (roma are the best) or canned diced tomatoes. I put a can of diced tomatoes in a food processor and pulsed it on low for a nice, thick consistency.
Add a few tablespoons or a 1/4 cup of red wine of choice if using a large amount of tomatoes (I used Cabernet sauvignon). Let it thicken for a few minutes. Add a heaping spoonful of tomato paste if it needs thickening.
Add spices of choice. I added fresh chopped basil, oregano, pepper and a pinch of kosher sea salt. Adjust amounts of seasoning depending on your taste preference.

If you want it spicy, add a few dried red whole chilies while the oil is hot before adding onions. Take them out just before serving.

This sauce freezes really well and can be used for pasta, lasagna, chicken parmesan, etc.

Then you can drink the leftover wine with friends/family/self!

Sunday, September 25, 2011

The phantom blog-member

Hi All!

This is Shannon, Alana's Bahston (as we say it back east) friend from high school. Yes, I knew Alana when she had her natural hair color (although, we can't remember what it looks like all the time) and before she tattooed, pierced or branded. Throughout the years, Alana and I have both relocated to the midwest (her, a badger...and me, a wolverine), she has left me stateside for Africa (on more than one occasion) and one of the things that has kept us close (aside from a few life altering experiences along the way) was our love of food. In fact, it was our love of food that started our friendship (post break-up chocolate chip cookies, if I remember correctly).

Anyways...I just moved from Michigan to Washington DC for a new job (yay!) and while I am still very much in the move-in mode I have been seriously lacking in the food creating-and-blogging department. But fear not, I'm finally getting into a groove and will have something to add to this awesome blog soon.

Hope everyone had a good weekend :)

Friday, September 23, 2011

Chard & Chickpeas

This morning is a cooking extravaganza as I attempt to use up all the vegetables from my veggie box this week. Luckily, it's not too much of a challenge when you have access to an oven, some canned goods, olive oil, and a garlic press! Want something SUPER easy and good for you for that lunch/dinner when you're running around? Prepare these ahead of time, stick them in the fridge, and they will be at your beck and call whenever needed! This is how I survive life as a busy student without spending a bajillion dollars on lunch everyday. I just carry it with me!

Roasted Cauliflower

1 head cauliflower, cut into 1 inch florets
2 tbsp olive oil
2 tsp rosemary, minced
3/4 tsp salt
1/4 tsp white pepper *(I used just regular pepper...who on earth has white pepper readily available in their spice rack?)
1-2 cloves of garlic, minced *(I love garlic a little too much, so I actually used 4 cloves)

Mix cauliflower florets, olive oil, rosemary, salt & white pepper together.  Transfer to a baking pan & arrange in one layer.  In a 450 degrees oven, roast for about 25 minutes stirring occasionally. Once cauliflower begins to lightly brown, mix in the garlic then return pan to the 450 degree oven for 5-10 minutes--- enjoy!

Notes: I lined the roasting pan with non-stick aluminum foil to make clean up easier. Also, my oven turned out to be very hot, so 30 mins total was almost too much cooking time. Just pay attention and when the cauliflower starts to brown, add the garlic, and then cook for another 5 minutes maximum. Unless you have a cold oven. In which case...get a new oven.


Chard & Chickpea Salata 

1 bunch of chard (or any other green really: kale, collard, etc)
1 can of chickpeas, drained and rinsed
1 can of fire roasted diced tomatoes
2 cloves of garlic, minced
1 tsp olive oil

Wash and cut out the stems of the greens and place into a large pot with a bit of water at the base. Steam the greens for about 3 minutes, or until just wilty. Remove from pot and blanche quickly with cold water, then put into a medium bowl. Add the chickpeas and 3-4 Tbsp of the diced tomatoes and toss. Add the garlic and olive oil and toss again. Salt and pepper to taste and serve warm or cold!